Thursday, July 17, 2014

Black is the New Blue

My to-do list is still enormous, but I knocked off a couple of items over the past few days that I would have saved for last because they are sort of 'fluff' projects.  They got bumped up because I'm waiting for a few things to arrive that are preventing me from finishing some of the more 'meaty' tasks.

The other day I was in the cabin scrubbing and just got fed up with the smell of bleach and cleaners so I took a break and while I was down on the ground started picking at some flaking bottom paint.  I picked up my carbide scraper and started going to town on the paint.  It was pretty satisfying at first; seeing the chips fly off, revealing a painter's archaeological dig, with years of different colors revealing themselves as I went.  I had planned to 100% strip the hull, but I ended up just scraping it and removing all the loose crap.  I've done a full hull take down before and it is not a pleasant job and to be honest, I'm about done with non-pleasant jobs for the time being.  I'll consider doing that next year, but for now... screw it.

So after three hours of scraping I decided that I had done enough and the surface was good enough for me. I was still doing well on time for the day so I taped up the hull at the boot stripe and broke out the bottom paint.  I changed the color to blue because I never liked red, but to be honest I wanted to paint it green, but the super cheap bottom paint I bought (JamesTown Distributors Underdog) only came in red, blue, or black. Normally I wouldn't cheap out on bottom paint, but since the boat is going into freshwater for the first season, the $79 price tag was justifiable.  All I am really doing is making it pretty, there is nothing to foul in Lake Winnipeaukee (No zebra mussels yet).

Anyway, I got everything painted except for the area under a few of the jack stands.  There are two jack stands that I am a little worried about moving.  I have 9 of them that I regularly jockey around, but there are two that are chained together on opposite sides and the chain is drum tight, which leads me to believe that they want to slip.  I need to position a few more on either side of them before I move them.  I don't want to risk dropping the boat for something as stupid as cheap bottom paint.  It would pretty much ruin my day.

Yesterday, because I am notoriosly bad at taping straight lines, I lured my wife over to tape the top and bottom of the bootstripe which I wanted to change to black to contrast the blue bottom paint.  She is very anal about proper straight lines and true to form, she taped the bootstripe much better than I could have. Painting the bootstripe is really satisfying with a 2" foam roller, it only takes about 30 minutes to do the whole thing and the way the new 'hot dog' foam rollers lay down paint is amazing.  I'm sure they have been around for a while, but as a teenager, I only remember doing Dad's boat with a brush which isn't nearly as satisfying.

With some of the 'fluff' projects completed, I will now have to focus on my six (maybe seven) remaining 'real' tasks:

  1. Kiwigrip cockpit
  2. Install propeller shaft and new coupler
  3. Install and mount winch coaming blocks and winches
  4. Install genoa track
  5. Build composting toilet
  6. Measure and build up forestay
  7. I found a small antifreeze leak when running the engine around the exhaust manifold.  I ordered all new gaskets for the manifold, but I need to id the leak.
Of course there are a million little things but these are the ones that will take time.  

Monday, July 14, 2014

Final Score Me 2, Engine 1

Woohoo, the beast is alive and well thanks to the help of the good forumites at SailNet.  Particularly, Christian.Hess, Maine Sail, DeniseO30, and UnionPacific (I'm sure there are others) for showing me the way and sticking with the thread when they probably have better things to do than help out some schmuck who can't even spell 'deisel'. 

I skipped out of work at 2 today and raced home chanting "The Beast Needs to Be Bled".  I spent some time this morning going through the service manual diagrams and found that in addition to the injectors, there was a banjo bolt on the secondary filter and the low pressure side of the fuel injection pump. 

I knew from dumping a full bowl of fuel in the secondary filter that the fuel lift pump was at least getting the fuel there so I skipped right to the injection pump banjo bleed bolt and turned the ignition to 'On' to activate the fuel lift pump.  I let it run for 30 seconds or so and then cracked the banjo bolt open just enough to let out some fuel.  I let that be for 5 seconds or so, then cranked the bolt tight. 

Not thinking that this would do the trick, but willing to try, I cranked the engine and it sputtered to life almost immediately.  Right after that I heard the first 'sploosh' of the water lift doing muffler doing its thing and blasting water out the back of the boat.  I looked down and saw that raw water pump was also doing its thing and sucking the water from the bucket.  I ran through 2 buckets before shutting it down for now, but plan on putting a big 50 gallon plastic pickle barrel and running it for a while to see if there are any other leaks or issues that might crop up after running for a bit. 

Words can't describe how happy I am right now.  This was the last thing keeping me up at night.  I'm sure other things will come up before the launch but this puts me firmly in the 'splash it' zone.

Engine 1, Me 0

I have the 4 quart version
I finally tackled the dreaded engine this past week, and as the title implies, I didn't win... yet.  This has and is the last stumbling block to getting the boat in the water this year so there is a lot riding on it.  I wish I could just rip the whole thing out and use it as a mooring, but unfortunately, an engine is something that I absolutely need, even though engine repair is not really part of my skill set.  I'm hoping to change that though.

After a lot of research and queries on several boating forums, I decided that I would pump all the old fuel out of the tank and replace it with fresh new fuel.  I don't have an inspection/cleaning port on my fuel tank so the only access is through the fuel fill.  I used my oil change vacuum pump to pump out the fuel one gallon at a time and transfer it to a five gallon jerry can.  Once that was full, I poured it into my home furnace oil tank and repeated until empty.  Once the tank was empty, I added three gallons of fresh diesel to rinse out the tank as best I could and then pumped that out as well.  Finally, I added five gallons of fresh diesel and called it a day.

Once that was done, I started going over the motor to see if I could find any major problems. Since I am not much of a motor head, I determined that it was still red and made up of lots of pieces of metal.  However, I did find that many of the non-metal parts looked and felt a little wonky.  I found a nice technical manual online for my motor (Westerbeke W21) that had exploded diagrams of all the systems and decided that I should replace all of the cooling system hoses.  I also found some crystallized antifreeze on and around the thermostat gaskets and decided it would probably be a good idea to replace them.  I also figured that since had to take apart the thermostat housing to replace the gaskets, I might as well replace the thermostat as well.

I looked up HansenMarine (one of the Westerbeke distributors for the East coast) and found that they had a full parts list online that actually had part numbers that corresponded to my exploded diagrams.  There were a couple of differences between what my cooling system looked like and what was in the diagram, but when I called HansenMarine, the service rep (Jon) had me send him a photo of the engine and he was able to determine what the discrepancies were.  He was really helpful and we finally settled on all the parts on Thursday and finalized the order.  I didn't expect the parts to arrive until today, but I was pleasantly surprised when I came home from work to find a box from HansenMarine on my doorstep.

I got up early Saturday morning to get to work and started with standard engine prep procedures, I replaced both fuel filters, zincs, changed the oil twice (just for good measure), and changed the oil filter.  Next, I decided to replace the raw water impeller since I was replacing all the hoses to and from it as well and had forgotten what a royal pain it is to service the thing.

I removed the hoses thinking I would just pop off the cover, replace the impeller gasket and move on. However, the cover plate faces aft and only has about 2.5 inches of clearance between it and the starter motor.  Then it all came back to me... I had forgotten that it was actually easier to remove the entire pump assembly than it was to try and fiddle with six tiny machine screws that I would invariably drop in the bilge. It was still a pain, but not as bad.

Once it was off the engine, it was easy to pull the cover, replace the impeller, and re-install with a new gasket.  Before I bolted it back on, I replaced several cooling system hoses that were easier to access with the pump off.  I managed to get a cup under the lowest hose to drain the old antifreeze without spilling it all over the place.  That's a win in my book.

I bolted the pump back on and fitted the new hoses to it and moved on to the next set of hoses in the coolant line.  All of these were either right at the front of the motor or on top so it was just a matter of removing the old ones and clamping on the new.  The thermostat and gaskets were also not bad to replace because they are located right on the top, front side of the engine.  The housing was all gummed up with crystallized antifreeze so I took some time to scrape all of it out and clean it up before re-installing the new thermostat and gaskets.

I finished up with the final hoses and then refilled the cooling system with roughly four quarts of antifreeze. All told it took about 4 hours, but I was really pleased that I didn't run into any big roadblocks along the way. In the past engines have often done that to me, they act all nice and then present me with some stuck bolt or inaccessible screw that leaves me begging for mercy.  Not this time.  I can't imagine how much the $200 in parts I spent and my labor would have cost had I gone through a marina.  I'm sure they would have done the replacement faster, but it still would have hurt my checkbook badly.

Motor with sweet new set of rubba
It was now time for the moment of truth, would the engine even turn over?  I wasn't sure that if, during the course of the restoration I had screwed up the electrical system so bad that the motor wouldn't even get power.  I hooked up the battery turned on the breakers and put the raw water intake hose into a bucket of water.  I turned the key to the first position and heard the familiar power on buzzer and then turned it to the start position and the engine turned over without any hesitation.  It didn't start though, but I was really happy that I had even gotten this far.  Some more cranking and still no start.  The raw water intake also wasn't pulling, but from what I have read, they don't always self prime without the engine actually running with decent RPMs.

It was 11:30 at this point and I told my family that I would not be working on the boat all day and would spend time doing something summery, so I went back to the house and posted to a few forums looking for ideas and then went canoeing and swimming with the family up at Knowles Pond.  When we returned the consensus from the post was that the fuel system needed to be bled.  The Westerbeke I have though has an electric fuel pump and all the manuals state that it is self-priming and doesn't need to be bled.

The next day I tried one of the forum suggestions that I spray WD-40 into the air intake and see if it sputters when cranking.  It did and confirmed that fuel is not getting to the injectors properly.  Today, I will open up the injectors at the banjo fittings and see if I can bleed out the air from the system.  So for now, I am still engine-less, but I hope that I will be able to solve this without calling in a real mechanic and I'm 90% sure that I don't have a major problem on m.  Stay tuned....


Friday, July 11, 2014

Winch Bases on the Cheap

Throughout the entire restoration project, I've had ideas of how I wanted to tackle various projects so I could file them away in my head to flesh out while I'm unable to be actually working on the boat.  However, the winch bases were one of those things that I pretty much ignored because there was always something more important to take care of at the time. Eventually, as they kept coming up in my brain's 'to-do' list I decided that instead of wasting precious time and money building them from wood, I would throw money at the situation and buy them.

Spartan Marine in Maine makes some really pretty ones that I liked a lot and fit my particular winch. So, for the past year I have been reassuring myself to not worry about the winch bases, I just have to pick up the phone and order them and they will be at my door in two days, ready to bolt on.  Well a few weeks back when it was time to actually pick up the phone and order them, I balked.  I do like those stands, they are really nice looking and frankly would save me a good amount of time, but at ~$250 each, the Minister of Finance living somewhere in my addled brain woke up and started yelling to me: "STOP THE BLEEDING".
The Minister was right.  Even though I don't have a lot of time, I have more time than money.  I'll sleep when the boat goes in the water.  So with the Minister's decision final I started picking through my dwindling inventory of Sapele to find something I could use.   My original plan was to stack and epoxy 2 or 3 2" blocks up and shape them to something that the winch would be happy on.  Unfortunately, I didn't have enough 2" thick stock left, but did have a bunch of 2" Honduras Mahogany that I could use but I was worried the difference in color between the Mahogany and Sapele would make the block really stand out. Also, I never really cared for the look of varnished end grain Mahogany, it just gets too dark (almost black) and never really gets shiny with varnish.

I finally decided that I would use the Mahogany as the base material, but face it with 1/2" Sapele that I could plane down.  This way I would have that nice Sapele ribbon grain showing and not much end grain.  I began by cutting the Mahogany into "house" shaped blocks and stacked them with an Aerosil and epoxy mixture to give me the desired height.

Once that cured up, I cut and planed the Sapele face pieces and cut those to the same height as the epoxied up blocks.  I cleaned up the squeeze out from the first layup and then it was just a matter of epoxying the Sapele blocks around the front side of each block.  The only tricky side was the angled side because it was difficult to clamp at that angle.  Overall all the layups took 4 days, but the time spent on each one was only a few minutes (mix epoxy and Aerosil, spread it, place face blocks, and clamp)

With everything glued up, it was time to shape it down.  Using my trusty Shinto rasp (best thing ever: see here), I shaped each block down to a pleasing (to me) shape.  Not quite circular but not angular either. Next, I brought them over to the boat and fitted them to the coamings.  The angle between the coamings and the deck is not 90 degrees, it's more like 95, so I had to rasp down the back of each block so they would fit nicely along the coaming.  They will be bolted through the deck with the six winch bolts and then screwed to the coaming and bedded with SikaFlex 291 (mahogany color).

Now that the blocks where shaped and fitted to the coamings it was time to drill for the winches.  I positioned the winches on each block and marked the center of each of the six bolt holes and drilled them out using a 5/16" bit.  I test mounted the winches to make sure I had drilled all the bolts straight and then after pulling them off, I sanded everything down and got the first coat of varnish on.  I may drill the deck holes today but I need to get a longer bit first and I won't do a final mounting until I get 5 or six coats of varnish on them though.

Overall I'm pretty happy with the way they came out and the Minister of Finance is ecstatic!  Maybe I can now convince him that I really need a 10" bulkhead mounted chartplotter.


Tuesday, July 8, 2014

What's Next?

My head has been spinning the past few days with all the stuff I have to get done if I am to get the boat launched for August.  The good news is that all the stuff that has to get done is reasonably minor with the only unknown being the engine.

The boat shed has been really hot lately, so working in there is less than appealing.  Within five minutes of entering I have sweated through my t-shirt completely and just end up tying it around my head. I just want this damn thing done now!

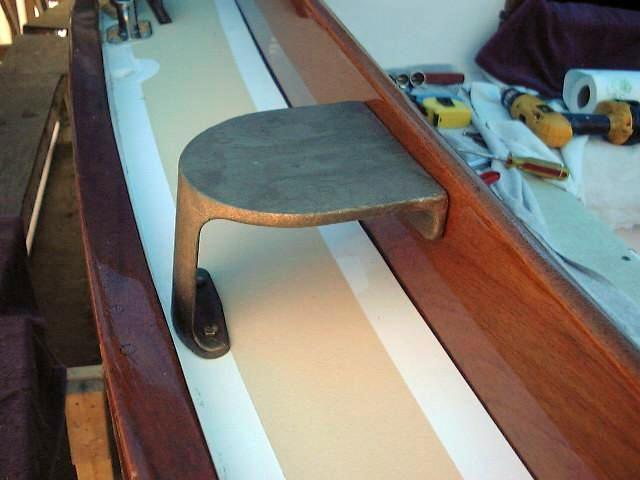
I won't go into too many details for this post but my tasks have run the gamut from bolting down hardware (including the main sheet traveler), to changing engine oil (twice, for good measure), bolting on the bronze strap for the rudder, polishing cleats and dorades, and general cleaning.  Bolting down the hardware has officially gotten old, but I'm down to one hatch, four chocks, the winch bases, and the genoa tracks.


Monday, July 7, 2014

Engine Controls

I've been putting off installing the engine controls for a while now with no good reason.  There was always something that I thought I should do first but ultimately, I get a little skittish whenever I have to deal with the engine.  Well, I ran out of good excuses the other day and decided it was time to get it installed.

When I first bought the boat in 2001 the engine controls were mounted on the side of the cockpit just aft of the engine instrumentation display.  They were the old style two lever affair that required that you first shift into forward or reverse, then throttle up for power.  I never liked those controls because it required a small bit of thinking when you really wanted to be focus on not banging into something.  The next year I replaced them with pedestal mounted controls that because of their location made it much easier to focus on the task at hand and not worry about taking your eyes off the 'road', bending down and doing a quick multi-task.

Now that I've removed the pedestal though, I need to go back to side mounted controls.  I decided to pay a few extra dollars for a Teleflex CH2100P unit that integrates the shift with throttle (or the other way around if you like).  With this control, it's simply a matter of pushing the lever forward or backward depending on the direction you want to travel.

I decided the best spot for the new control was right where the old ones were, so I taped the paper cutout template supplied with the new control to the spot where I planned to mount it.  It was all pretty straight forward: drill out the corners with a 3/8" bit and connect the dots with a sabre saw.  Because this control is often mounted in areas that are inaccessible from the back side, the cutout is quite large so the control can be fitted from the cockpit.  I wish there were more options for this mount because this spot happens to be one of the few parts of my boat where access is decent from down below.  A smaller hole obviously means less potential water intrusion, but the cover plate for the unit seems to be sturdy enough and I should be able to seal it nicely.

Once I had the hole cutout, I attached the cables to the unit and routed them to the approximate location of where they would attach to the engine.  I was able to reuse the old cables from the pedestal (they are Teleflex 3300 universal cables).  They are a bit beat up, but they slide nice and smoothly inside their jacket.

Fitting the actual unit to the hole was like one of those metal puzzles where you have to separate a piece of metal from another piece of 'pretzl'd' metal.  I had dry fitted the control unit in the hole before I attached the cables with some degree of difficulty, but once the cables were attached, it seemed just about impossible. After a fair amount of struggle with no success, I was laying in the quarter berth with the whole assembly on top of me thinking about how I could cut a much bigger hole, fit it with some wood trim and bolt it all together again.

Fortunately, cooler heads prevailed and I decided to take a breather and work on something else before I made a complete mess of the cockpit.  I returned an hour later and with some well placed words of encouragement (albeit a bit demeaning), I figured out the puzzle and it all slipped into place.  My eleven year old daughter Olivia was kind enough to help me by holding a screwdriver on each of the four mounting screws while I tightened them from the quarter berth down below.

Once it was fastened down, I got the throttle cable attached with a quick release fitting that was already on the cable, but the shift cable didn't have a fitting (it must have gotten lost when I removed it from the pedestal).  I have a new fitting on order and it should be in the mail tomorrow.

All in all, it went pretty well, and I think the design of the control is pretty cool.  It's kind of a Rube Goldberg exercise in levers, but from what I've seen with people who have them installed, they work really well.  I wish that I didn't need such a big cutout for the unit, but I hope to be able to get it waterproof.


Wednesday, July 2, 2014

Railing Along

I took a few days off work this week under the guise of 4th of July vacation, but in reality I'll be spending a good deal of time finishing up all the projects that need to get done before launch.  Unfortunately, by about 10 AM the boatshed is about a 1000 degrees and is generally not a fun place to be.  Oh well, sucks to be me...

Anyway, I got up really early to beat the heat and got started on getting the pulpit installed.  It had been sitting in the shed for all these years gathering dust and it needed to be cleaned up a bit.  I dusted it off and rubbed it down with NeverDull and was able to get a good amount of the staining off.  

Using a continuity meter I checked the running lights on the pulpit and found that the port side was good, but the starboard side was a mess.  It was all corroded and the wires were hard and cracked.  I guess it was time to replace the wiring, but since the wiring is hidden in the pulpit tubing it became a bit more complicated than I would have liked.  Fortunately, it didn't cause me too much trouble to chase the old wiring out with the new.  30 minutes later and I was ready to mount.

I had my son help me bring it up onto the boat and get all the bolt holes tapped and then I laid down a thick bead of SikaFlex 291 on each area of the deck where the pulpit would ultimately rest.  Then we fed the new wires from the pulpit into the hole that I had tapped for them and set the pulpit in place.  From there it was just a matter of one of us going down into the anchor locker and putting on big 1.5" fender washers and a locking nut and snugging it all down.  I didn't use backing plates for either the pulpit or pushpit because the multiple attachment points for the rails make leverage accidents less likely (although not impossible). 

Once everything was well tightened I cleaned up the squeeze out and moved onto the pushpit where I did essentially the same thing except there were no wires to replace there.  All in all it took about 4 hours to get both bolted on.  I took another hour to cut and mount the hawsehole up by the pulpit.  I'm now down to 3 cleats and 4 chocks left to mount.  I hope to get most of this done this weekend along with the winch bases, engine controls, and always more varnish, but we'll see.